
Sometimes I feel like it would be a lot easier to enjoy bacon without the internet trying to fetishize it. I don’t know who’s to blame for this, maybe Ron Swanson? He seems like one of those outdated memes Facebook uncles can’t let go of, like Chuck Norris and “winning!”
Anyway, bacon has its place. I like bacon too, just please calm down (and maybe get some exercise). In fact, I would go so far as to say that one salient bacon law too often glossed over in the internet’s bacon hagiography is that how good it is really depends on how it’s cooked. I’ve had at least as much bad bacon as I’ve had good (not to mention bacon unnecessarily shoehorned into dishes that didn’t benefit from it). I would even go far as to say that American bacon* has the highest ceiling and lowest floor of all bacon subcategories.
Good bacon is magical; bad bacon is garbage. (*as opposed to Canadian or back bacon, cut from the loin; or British rashers and Australian middle bacon, which have both belly and loin).
Certainly, the way you prefer your bacon is a personal preference, not to mention a cultural one. I remember going to a Subway in Russia in the late aughts, and after ordering a sandwich with bacon on it, watching the sandwich maker just put white, ungrilled, streaky bacon on there like it was prosciutto or something. Most American bacon is cured and smoked, so depending on the type it might be possible to eat “raw,” but I was too squeamish for that and picked it off. (For the record, the friends I was with ate theirs and they were fine).
Anyway anyway, the obvious question with streaky American bacon isn’t so much whether to cook it (yes), but how. In a pan? In the oven? On a grill? What’s the best way? I tried to compile every method I’ve heard of and compare them, as best I could, head to head.
PART I — The Method
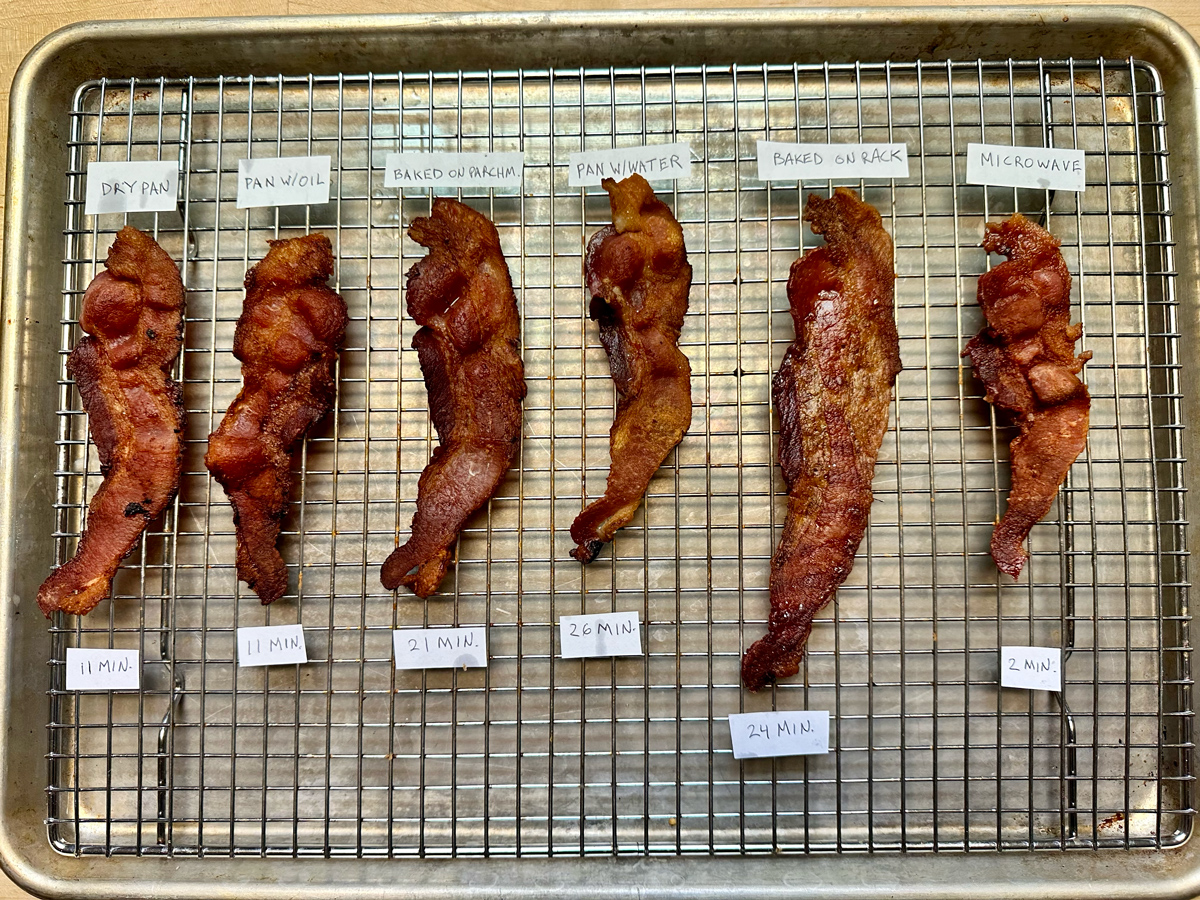
Here are the cooking methods I used:
- Dry Pan
- Pan With Oil
- Pan With Water
- Baked On Parchment Paper
- Baked On A Rack
- Microwaved
- Sous Vide
- Grilled Over Open Flame
This was almost everything I could think of, short of deep frying (I didn’t feel like wasting a quart of oil on a few strips of bacon) and the air fryer. I didn’t include the air fryer method for a few very simple reasons: firstly, I don’t own an air fryer. Secondly, I’ve seen an air fryer, and what’s the most bacon one could even conceivably fit in in an air fryer? Two, maybe three strips of bacon? That seems like an extremely narrow use case. Besides, if you’re the type of person who swears by making two pieces of bacon at a time in your air fryer, I doubt anything I say here would convince you otherwise. In fact, I imagine you’re only reading this insofar as it validates your choice in buying an air fryer.
So to those people, I say: Great job buying an air fryer! You are seen.
For this test, I used regular-cut bacon. It seemed a bit much to try every cooking method with both thin and regular cut. And then what was I going to do, have two separate rankings for each? I probably would say I prefer the thick cut kind, but every grocery store I’ve ever been to seems to have five times as much regular cut as thick cut, leading me to assume that regular cut is more popular (me calling it “regular cut” is another clue). For the most part, I don’t think they cook up that much differently.
I used Farmer John brand reduced-sodium bacon, because my grandfather used to drive a Farmer John truck, and because I actually like less-salty bacon (I’ve bought a lot of salt-bomb bacon that I ended up throwing out lately). Anyway, it seemed like a fairly standard, middle-of-the-road grocery store brand bacon that made sense as a control group.
For most of the cooking methods, if it seemed right I went with the first cook. If something seemed off or improvable, I tried it again. I detailed those below.
PART II — The Ranking
9. Pan With Vegetable Oil
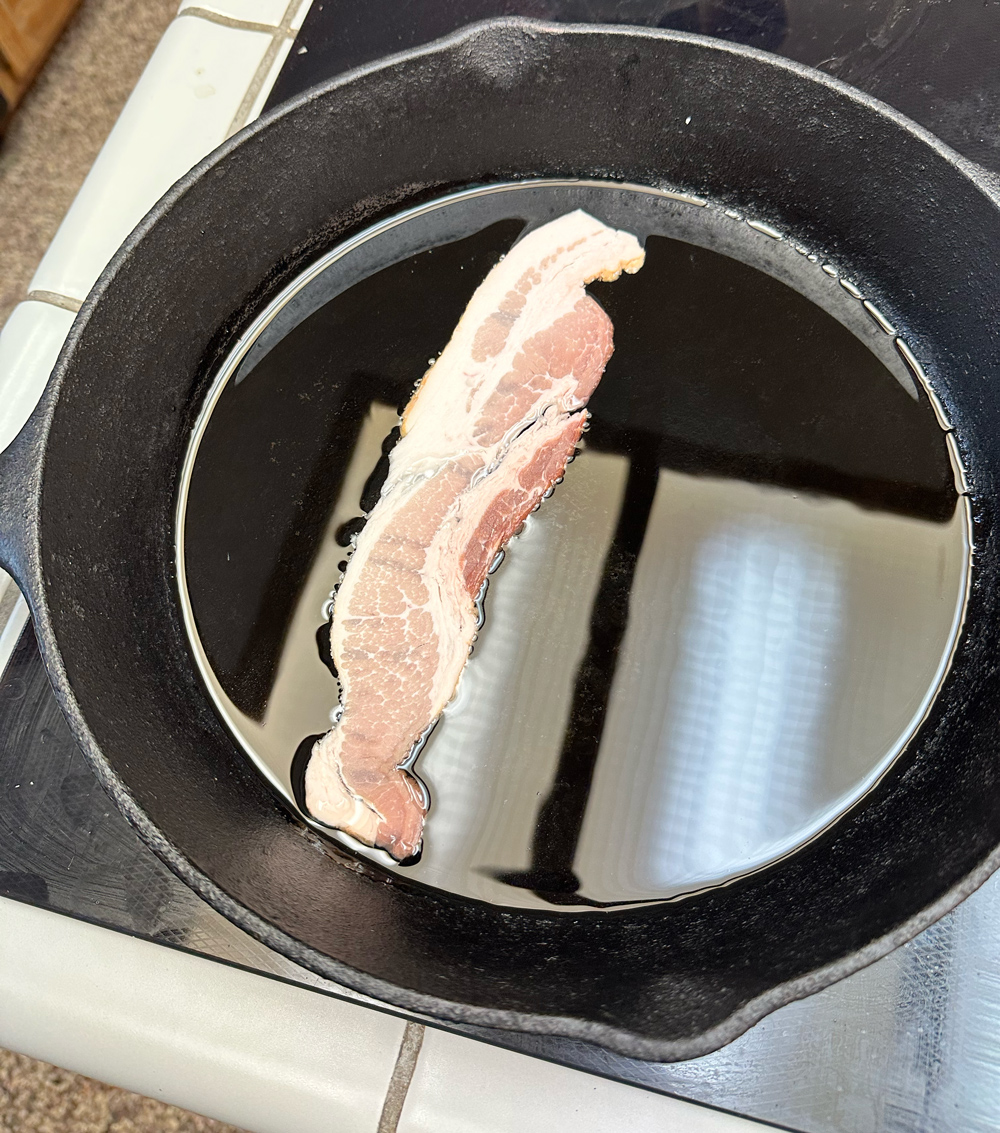
For most of my life, I cooked bacon in a dry pan. But after I discovered how good hot dogs were cooked in a little oil in a pan, I figured the same method was worth a shot with bacon. For the first run, I just grabbed a bottle of “vegetable oil.”
Time: 11 minutes.
Original Notes
Nice even cook, though darker. Lots of curling. The texture is nice, though pretty similar to a dry pan. The main issue is that I can taste all that vegetable oil, and it’s pretty gross. Much, much worse than I expected. The bacon is distinctly redolent of soy beans (which is what “vegetable oil” is generally made from) and it’s an unexpectedly terrible combo. The texture is great, but the taste is by far the worst of any other method. Of course, I could probably solve that by using lard or maybe even just a different type of oil… which is why I’m going to retest this method that way.
Bottom Line
I knew the type of oil would have some effect on the outcome, but not this much. The cook was even but the flavor was terrible. Not just side by side, everyone at the table would notice if you did it this way. My main takeaway here: keep vegetable oil away from your bacon.
8. Sous Vide
So this one probably requires some explanation:
I have a sous vide machine (water circulator); I have bacon. It honestly never occurred to me to use said sous vide (water circulator) to cook said bacon. That suggestion came from Uproxx Life food and whiskey maestro Zach Johnston, who suggested “Leave it in the original package. 147 degrees (Fahrenheit) overnight then one side on the grill.”
Seems wildly elaborate for bacon, but hey, we’re trying to test out all methods here, right?
Time: 24 hours, plus about 7-8 minutes on the grill.
Original Notes:
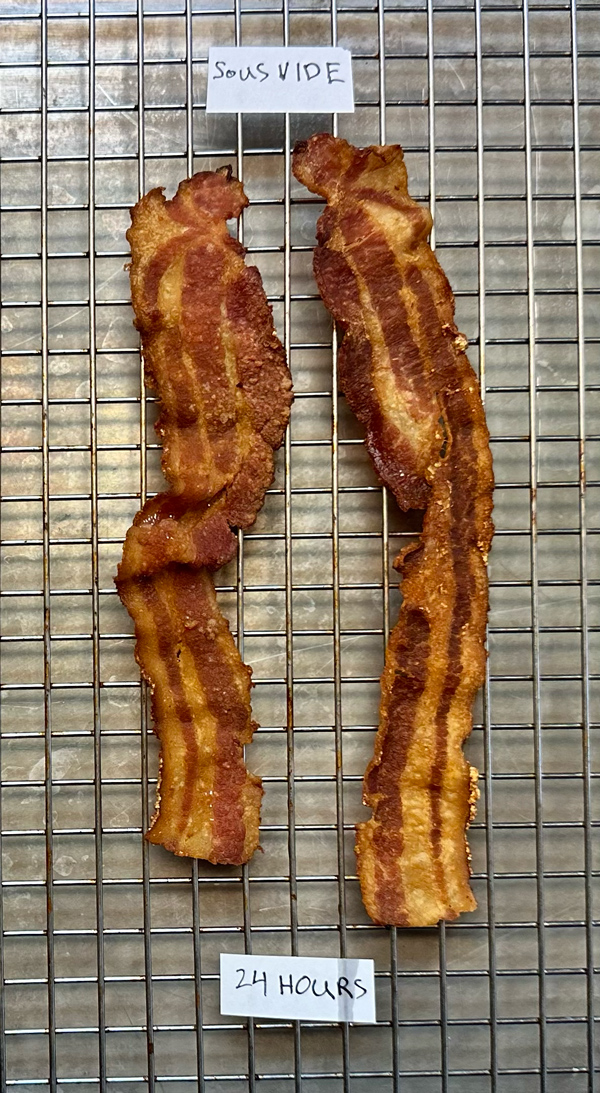
Light in color, the lightest of the group. The fat looks well rendered and very evenly cooked overall. Relatively flat. Putting it my mouth… the taste is too crumbly for me. It’s insubstantial and kind of crumbles all away. The second strip I picked up actually broke in half when I picked it up. Great for bacon bits but not for breakfast.
Bottom Line:
There was some trial and error to this one. I took a second crack at grilling the sous-vided bacon and found that if I pulled it when it was only just started to brown, it was less crumbly, but also a little less crunchy/rendered. The pre-rendering process definitely makes the pan cook go faster, but not that much faster, and doesn’t solve the crowded-pan problem.
After I grilled the three or four slices from the pack for this test, I put the rest of sous-vided pack back in the refrigerator. If I could pre-render with a water bath and then shorten the cook time the next time I wanted to grill it, I could see that being an upside. Trouble with that was, after I refrigerated them, I couldn’t get the strips back out of the package in one strip. They just tore into little pieces. Maybe if I had drained all the liquid fat from the package as soon as I pulled it it might’ve worked? I don’t know.
Seemed far more trouble than it was worth at that point.
Keni Lopez-Alt over at SeriousEats (where he apparently heard about it from someone else…) broke down this method, but noted “you want to do this with thick-cut bacon,” which makes a lot of sense. Regular-cut bacon is just too flimsy for this.
7. Microwave
I couldn’t not include microwave among the cooking methods. While the microwave mostly earns its reputation as a gross way to cook things (most people I know use it strictly for reheating these days), bacon is one thing microwaves actually do relatively well. If you’ve ever had a breakfast sandwich from coffee shop, you’ve probably already had microwaved bacon. Having worked at a deli, I’ve probably microwaved thousands of bacon strips in my life (you think your deli is griddle-cooking that bacon for your sandwich every morning? extremely doubtful). Even with that life experience, even I forget that you can microwave bacon at home.
Now that you know you can, presumably the bigger question is, should you?
Time: 90 seconds.
Original Notes:
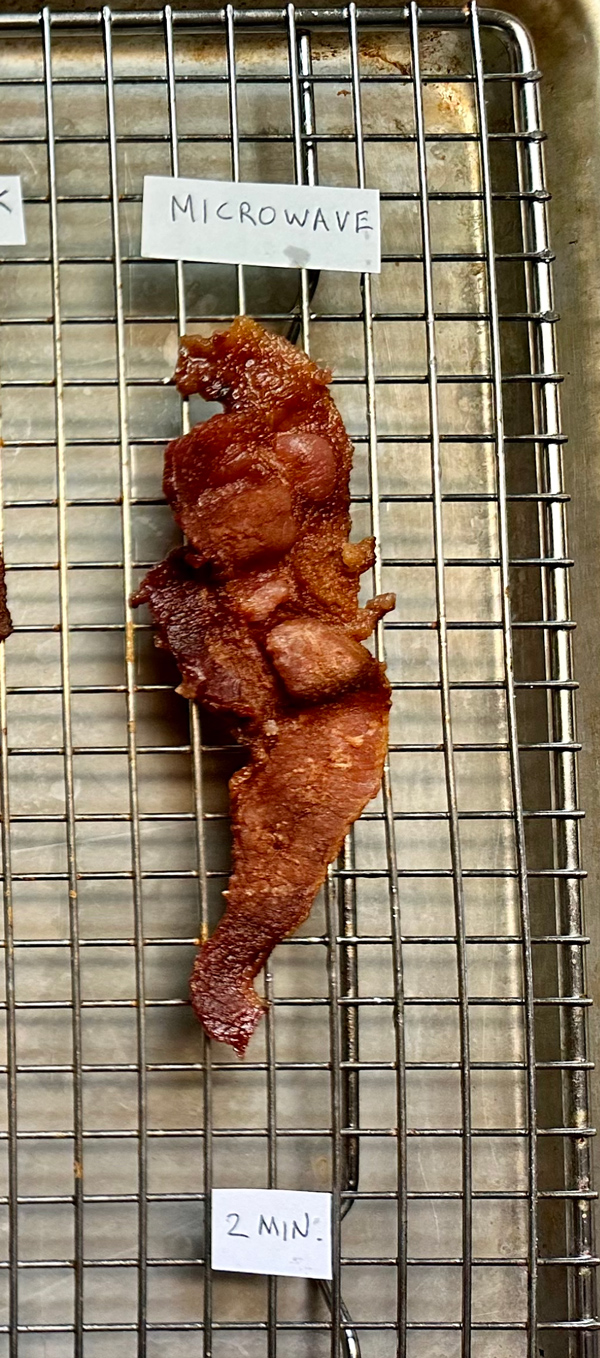
Super curly, and the bacon seems to have shrunk the most of any method. The color is actually nice though, more golden. Texturally it’s the toughest, the *hardest* as opposed to the crunchiest. You know what though? Still pretty good. The fat is nicely rendered, but there are a few meat parts that are hammered to the point that they’re pretty stale tasting.
The main downside of the microwave method is that while it does give you nice rendered crunchy fat insanely fast, in order to get that you tend to have to overcook the meat parts.
Bottom Line:
The microwave is, obviously, extremely fast, and as you can see from the picture, it actually looks mostly like any other cooking method. As for the taste… it’s not terrible, but certainly flawed. It renders the fat beautifully but hammers the lean bits in the process. If you were making an elaborate breakfast and didn’t have stove or oven space to cook the bacon, and needed it timed out just right, and the bacon you were using was particularly fatty, I could see going microwave. I think you could probably fool your guests with this.
But under most circumstances I don’t know why you’d want to.
6. Pan With A Water Bath
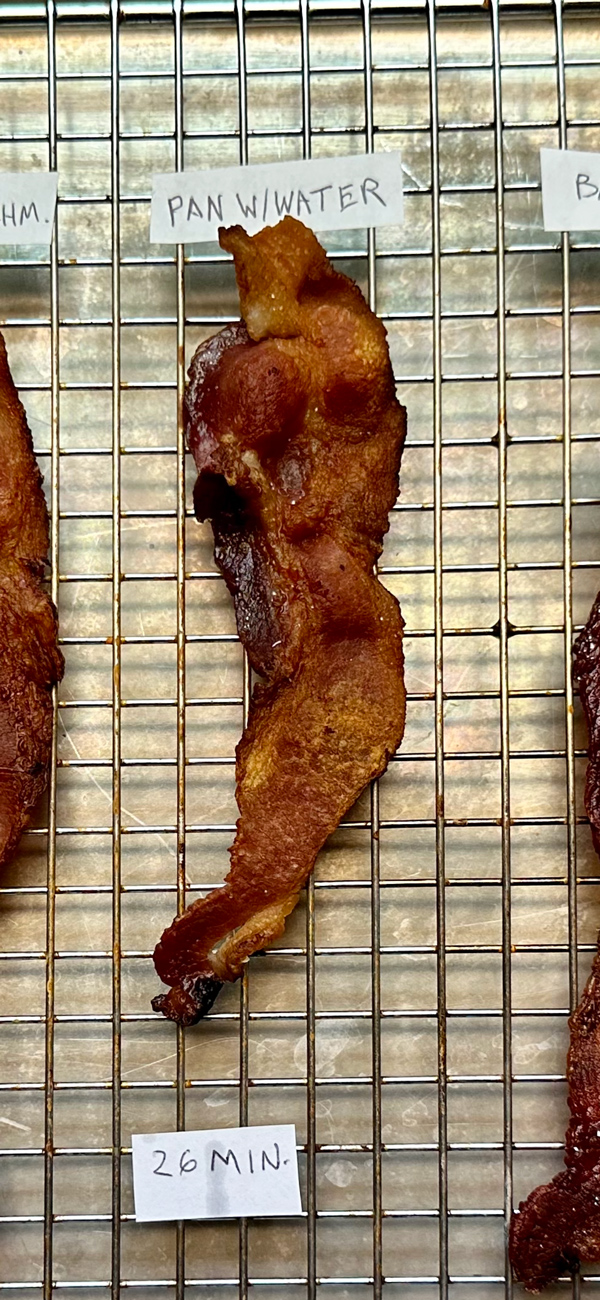
This one too probably requires a little explanation too. Having watched Jacques Pepin religiously, I’ve seen him suggest, on multiple occasions, to speed up the rendering of any sauce that starts with bacon or pancetta, by covering the meat with a little water and bringing the water to a boil. That way, so the theory goes, the boiling water starts the rendering, then the water boils off, leaving just the hot fat that then finishes cooking the bacon.
I thought, if it works for smaller pieces of bacon or chicharrones or pancetta, why not whole strips of bacon?
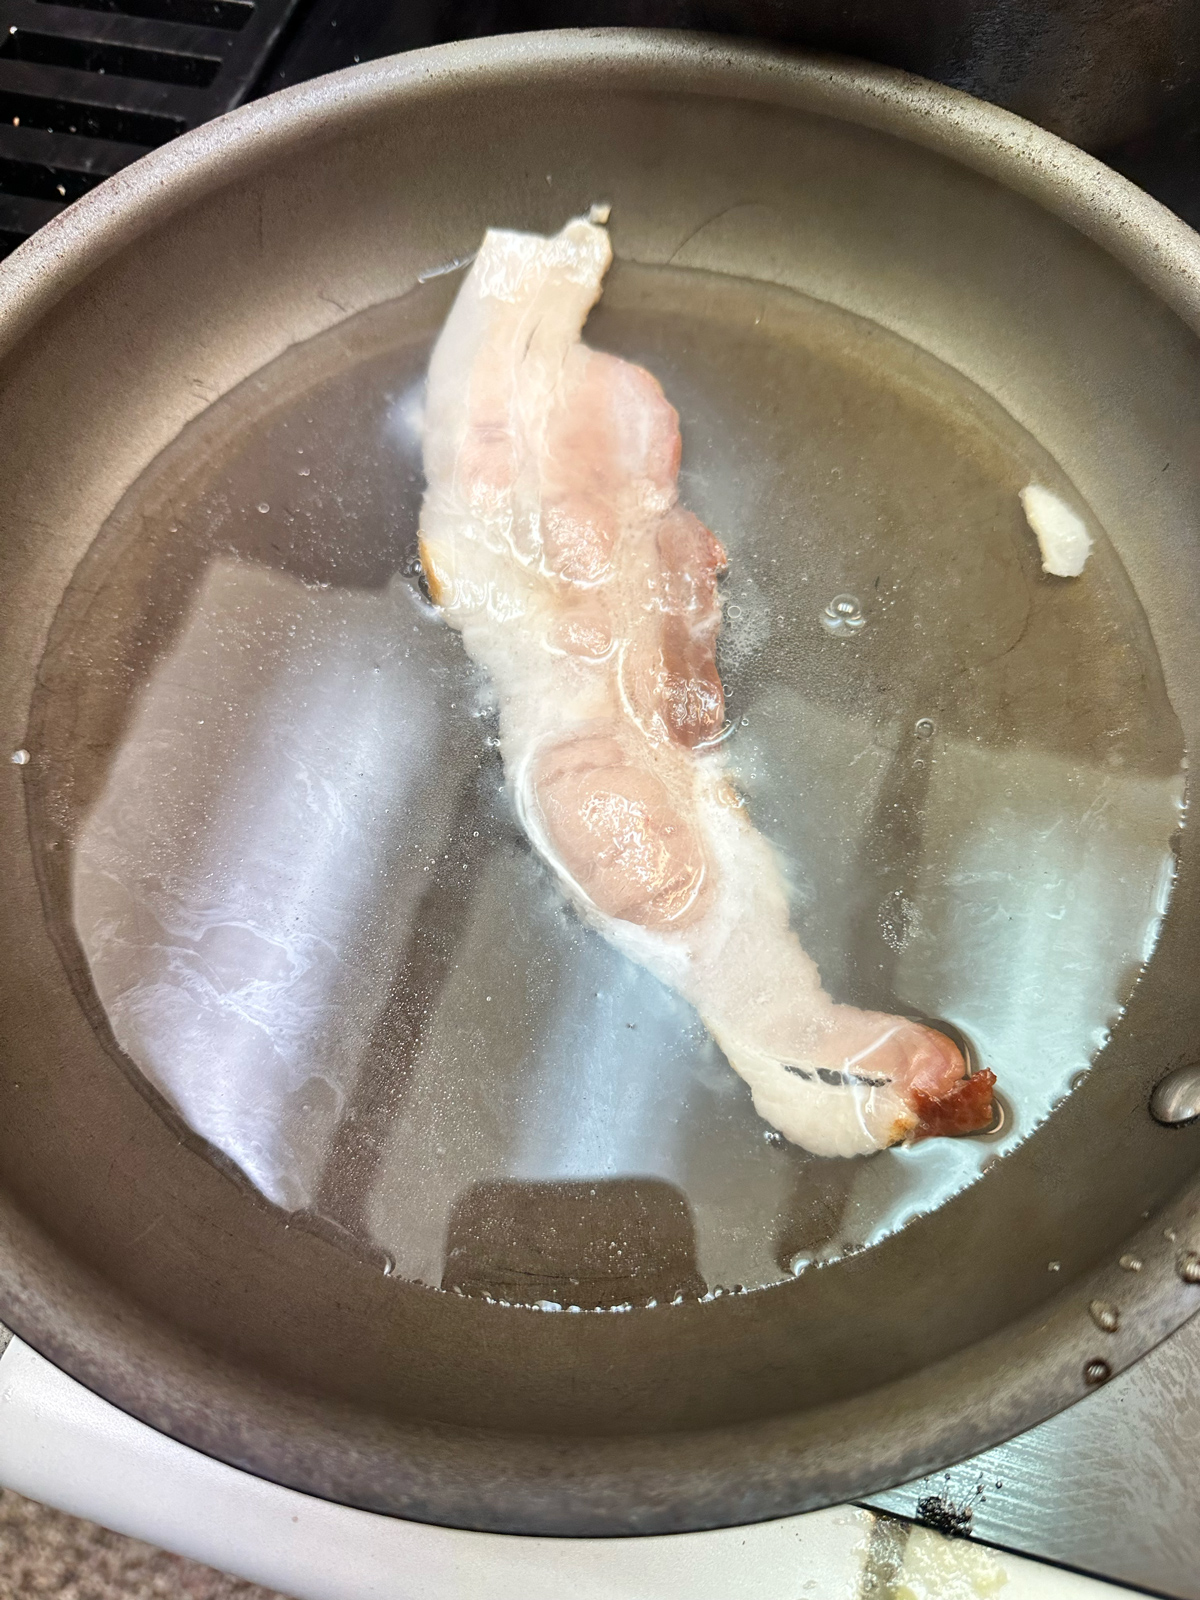
Time: 26 minutes.
Original Notes:
The main visible difference here is that it’s distinctly lighter in color than the other methods. Curling is slightly less than with oil pan. In my mouth, texturally this is a lot closer to the baked bacon, with melty fat and meat that isn’t as hard as the other pan methods. The salt level is also distinctly lower, not surprisingly, though that isn’t actually a bad thing with bacon.
Bottom Line:
The big surprise here was how much the water bath actually slowed down the cooking, when I thought it was sort of supposed to do the opposite. Sorry, Jacques? Maybe I did something wrong. The main upside here was the lighter color, with lean parts that were superior to the other pan methods. Of course, it taking so long to achieve this effect really undercut that advantage.
Since I was using lower-sodium bacon for this test, the water actually made it kind of bland, though I could see that being a bonus with saltier bacon. For the most part, though I can’t really see much point in using this one for your average bacon sesh.
5. Oil Pan (Peanut Oil and/or Lard)
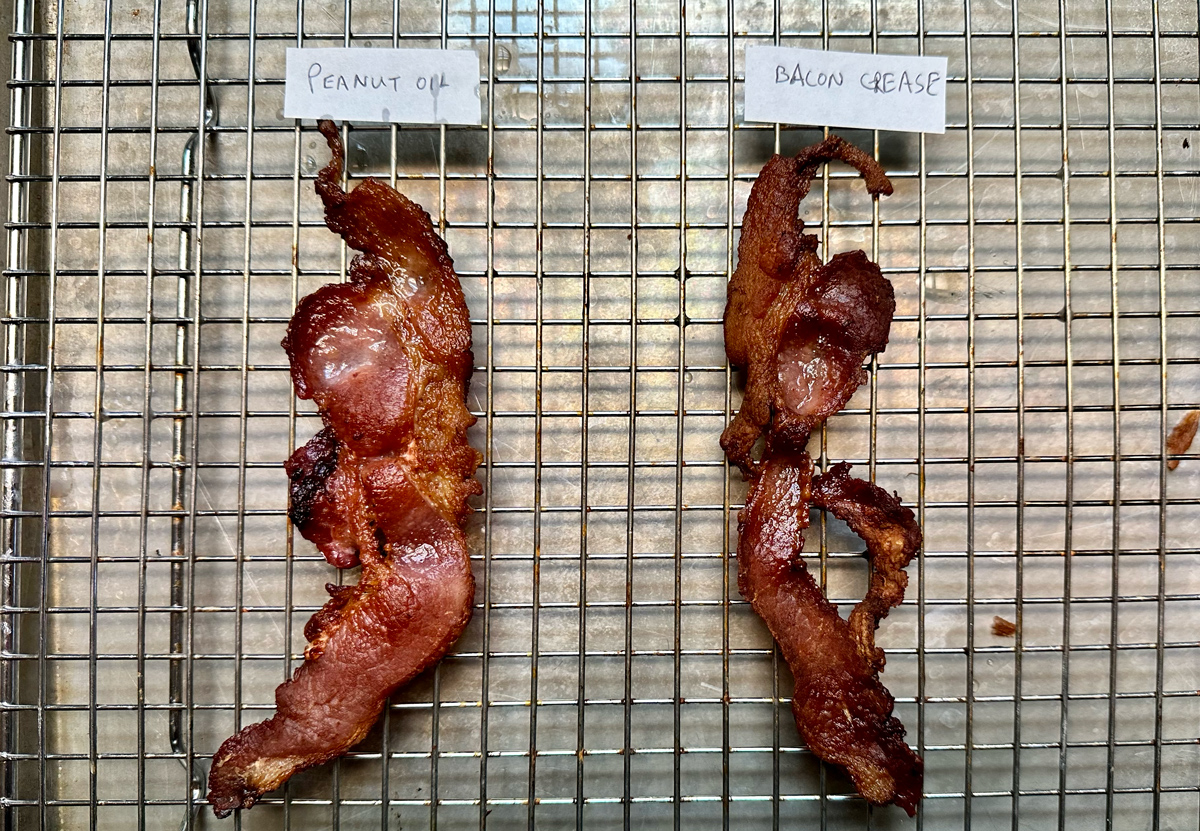
I really only tested these methods because the vegetable oil tasted so bad. For one pan I used peanut oil instead of vegetable, and in another I used a bunch of bacon fat accumulated from the other methods.
Time: 11 minutes.
Bottom Line:
These tasted like normal bacon, and I couldn’t really distinguish between them, suggesting that it was the vegetable oil that was the outlier. The cook was maybe ever-so-slightly more even than with the dry pan method (which would turn into a bacon grease pan pretty quickly anyway if you’re cooking more than three strips of bacon in it). And while the fat was beautifully rendered and crunchy, the lean bits leaned a little stale and hammered tasting.
4. Dry Pan
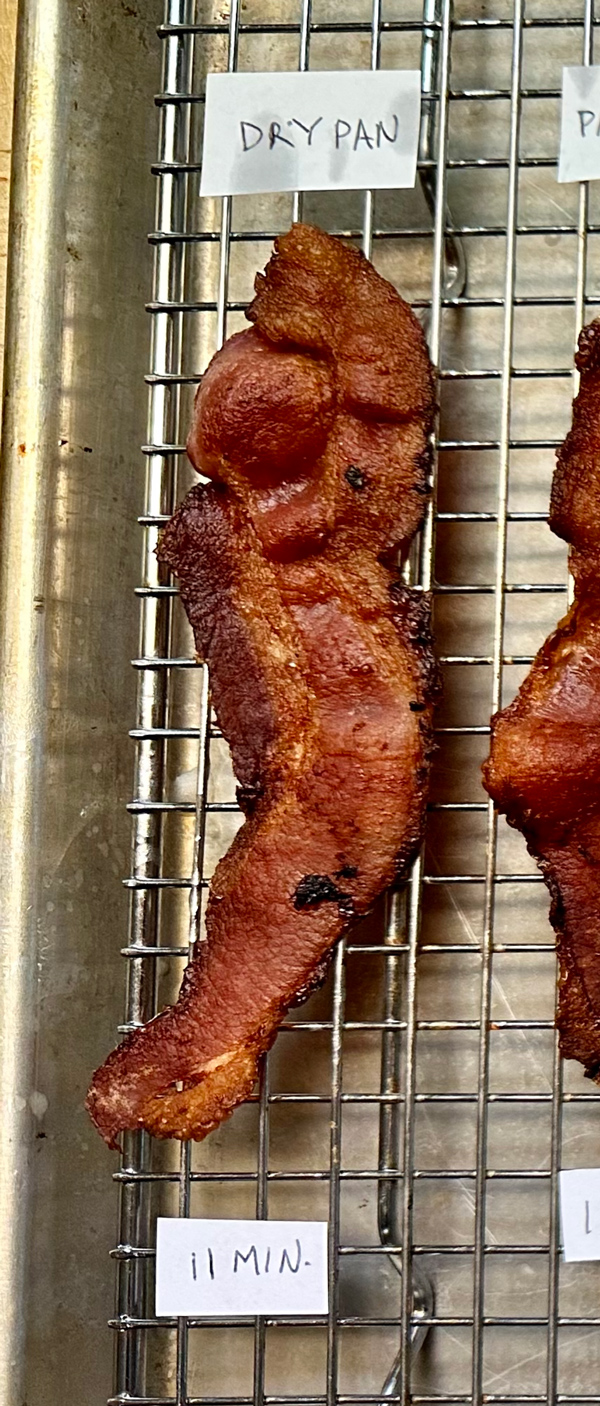
This was the way I learned to cook bacon, and presumably, most people do too. Bacon in a pan, cook until finished on medium-ish heat. Some people flip a lot, some people flip a little; I haven’t noticed that it makes much difference either way.
Time: 11 minutes.
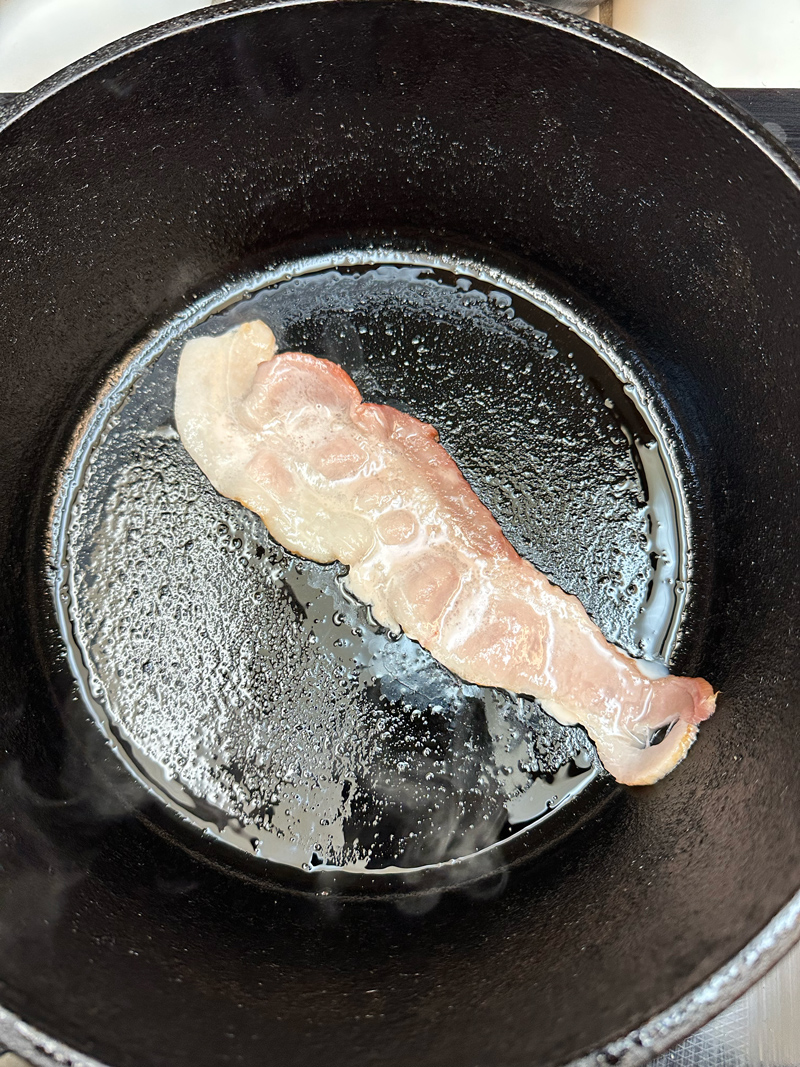
Original Notes:
Visibly a little more uneven than the oil pan and baked methods, with less curl. Mostly looks good though, the differences are fairly negligible. In my mouth, the fat is rendered nicely and melts in the mouth, though the leaner bits are harder and less melty. A lot of the lean parts fall into that awkward middle ground between chewy and crunchy, more like old tortilla chips.
Spice level is good, as you would expect.
Bottom Line:
The tried-and-true method earns a solid C+ from this reviewer. The upsides are that it cooks up pretty fast (one of the biggest surprises for me from this test was that adding water or oil didn’t speed up the cook time at all) and tastes pretty good. The downsides are that you’re limited by pan size and that you have to hammer the lean parts a little to get the fat nicely rendered.
Also, you have to stand there poking at it.
3. Baked On Parchment Paper
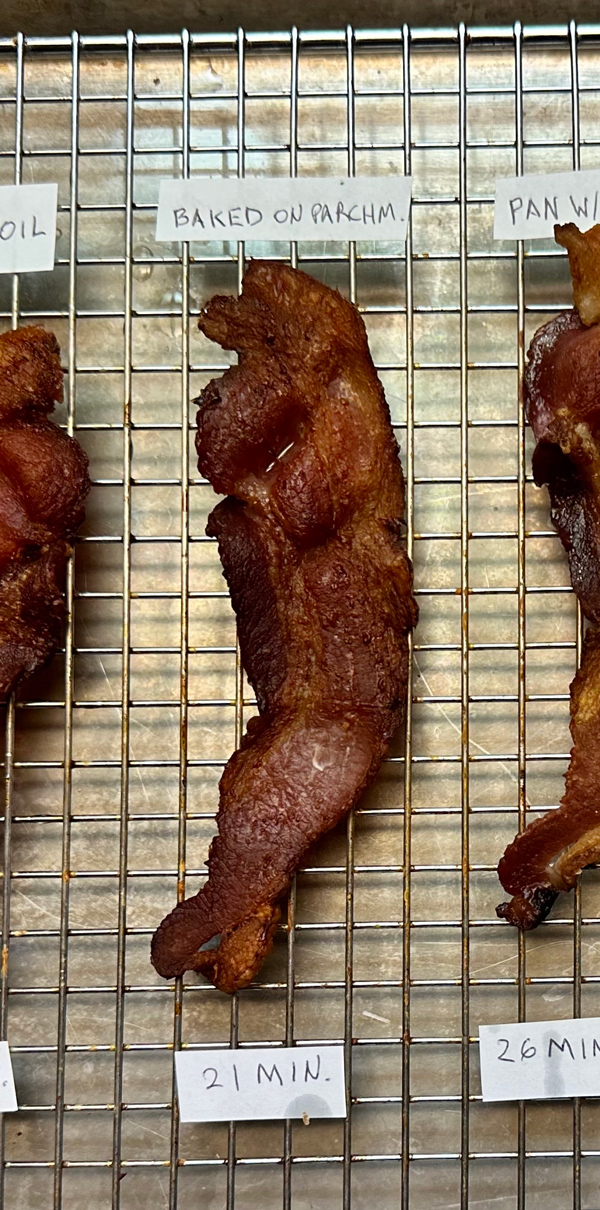
This was the method I switched to after pan frying once I learned that you could. Throw some parchment paper on a baking sheet (for easier cleanup), put the bacon on there, and set the oven to bake at 375 (Fahrenheit). It takes a little longer, but you can also fit more bacon on a sheet pan than you can a pan, and you can kind of set it and forget it.
Time: 21 minutes.
Original Notes:
In color, it’s slightly lighter than the dry and oil pan methods, with curling that’s a little more than dry pan and a little less than oil pan. Texturally it’s superior to both. You get the melt-in-your-mouth rendered fat that’s the same, but the meat is less hard and almost melts in your mouth. Taste-wise it’s good, with nothing in there to alter the original flavor of the bacon (like water or oil).
This is a very good method overall when you consider how easy it is to set up, cook, and clean.
Bottom Line:
Tasting them side by side, which I’d never actually done before this test even though I have made both often, the textural superiority of baked bacon to pan-fried was pretty stark. The fat rendered without the lean parts getting that stale-tortilla chip texture, and the whole thing became melt-in-your-mouth delicious. True, it takes almost twice as long, but you don’t have to really watch it at all, it’s more of a set-it-and-forget-it process.
And then you can just let the grease dry and chuck the paper out in one go.
2. Baked On Wire Rack
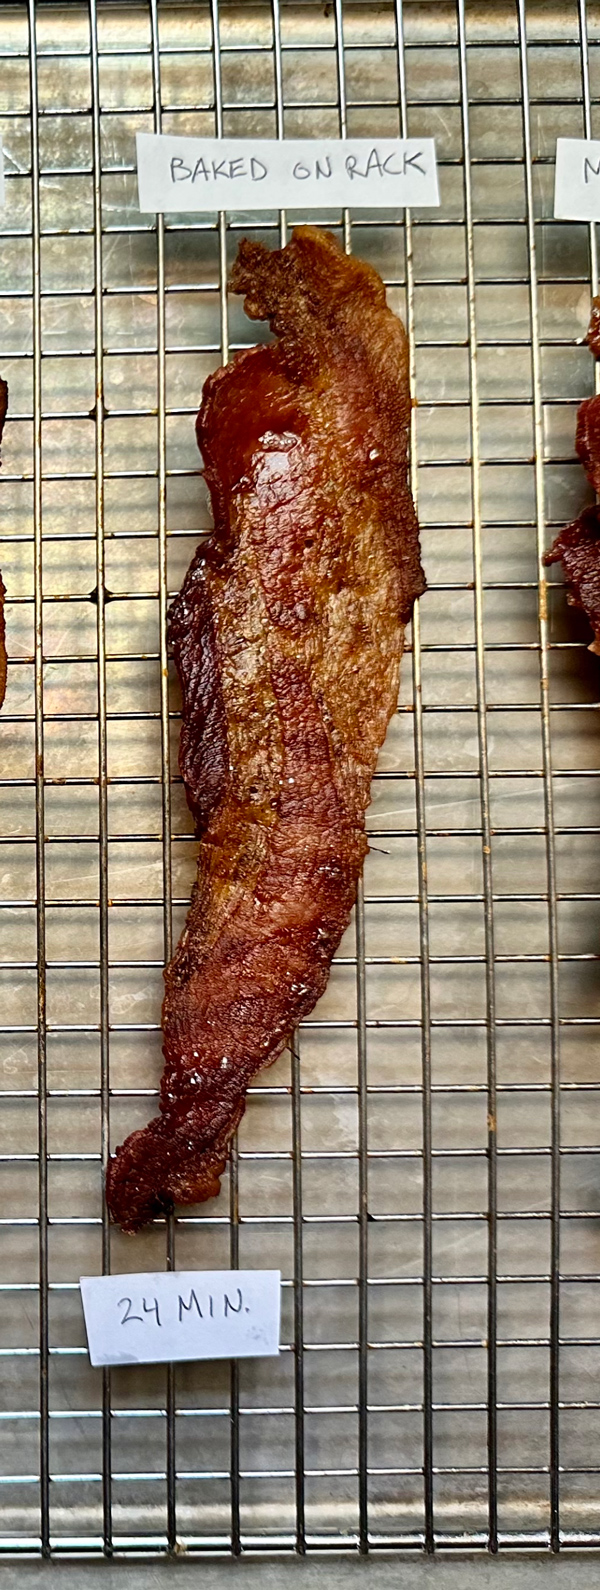
I’ve used this method a few times, but it seemed like a little more work than just putting down parchment paper and laying the bacon on the parchment paper. For this I used a sheet pan, covered it with foil (again, for clean up), put a wire rack on top and let the bacon bake on the wire rack. The main difference was that the fat would drain away from the bacon while it cooked rather than the bacon cooking in its own pooling fat like it does with the parchment paper method and in the pan on the stove.
Time: 24 minutes.
Original Notes:
The least curling of any method, it’s actually weird how flat this bacon stayed (which isn’t a plus or a minus, I don’t really have a preference on whether my bacon is curly or flat). Color-wise, it’s lighter than the pan methods but not as light as the water pan, microwave, or sous vide. The slice seems bigger than any other method too, like it somehow shrank less. Biting in… mmm, the fat on this is so crumbly and delicate. It seems almost aerated compared to the other methods. The meat is only slightly less crumbly than the fat. It falls apart easily but it’s very melt in your mouth. Easily the best so far.
Bottom Line:
Again, I’d baked on a rack and on parchment before, but having them side by side really highlighted the differences. The rack-baking method was noticeably, if only slightly, better than parchment. It also took slightly more time, and a little bit more prep. But on that note, was it really that much more elaborate than parchment? Parchment takes less time to set up, but once it’s done, you have to take the bacon off the parchment and put it somewhere to drain. Whereas with the wire rack it’s already draining so you can just pull it out of the oven and leave it there. I’ll be a rack man from now on.
Or I would be, if not for…
1. Right On The Barbecue Grill
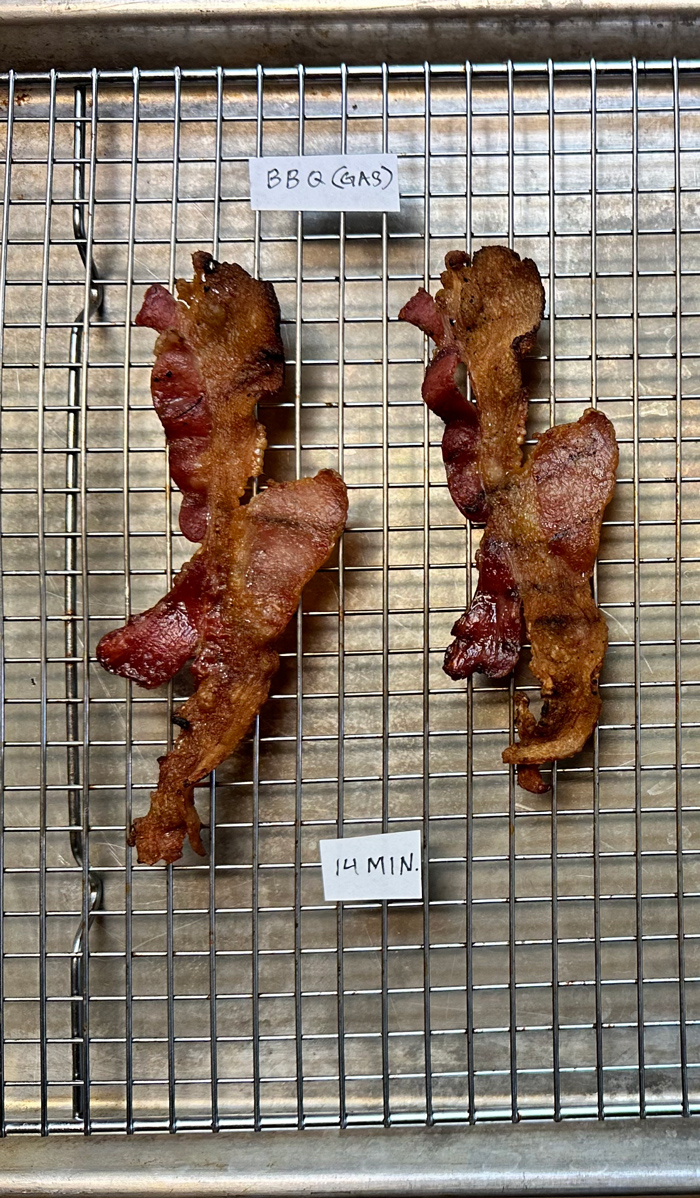
When we’re cooking a hamburger, steak, or hot dog, going outside to the grill seems like the obvious play.Why isn’t that also true for bacon?
Okay, probably because we tend to want to stay indoors while cooking breakfast. But still! I’ll admit, even I didn’t think of this method right away, and I had a memorable grilled bacon experience. It was in Australia, at a Safari Camp, right after I got engaged. Our guide cooked us up a feed (in Australian parlance) using only a grill and it was one of the best breakfasts, and best bacon, I’ve ever had (engagement was pretty tight too). Granted, cooking bacon over a grill seemed especially Australian, and it was Australian bacon, which is different, which is probably why it generally didn’t occur to me before now.
Still, I thought, it had to be worth a shot.
For this method, I used my very cheap, not-very-clean crappy propane grill. If you have a nicer grill, a charcoal or a wood-pellet job, I imagine it could only be better than this. Roast me for my dirty grill if you must. But also, I’d contend, shouldn’t a grill be kind of dirty? Discuss.
Anyway, I know my grill tends to cook fairly hot and unevenly (remember, cheap), so I chose a cooler spot. I heated it nice and hot on high for a few minutes (the ol’ “Dudes Rock” sanitization method) then put the bacon on and immediately turned it all the way down (I also hoped getting it nice and hot first would keep the meat from sticking). Then I closed the lid and walked away for a few minutes. When I came back the bacon seemed to be cooking nicely so I basically just flipped it over once and pretty soon after that it was good to go.
Time: 14 minutes.
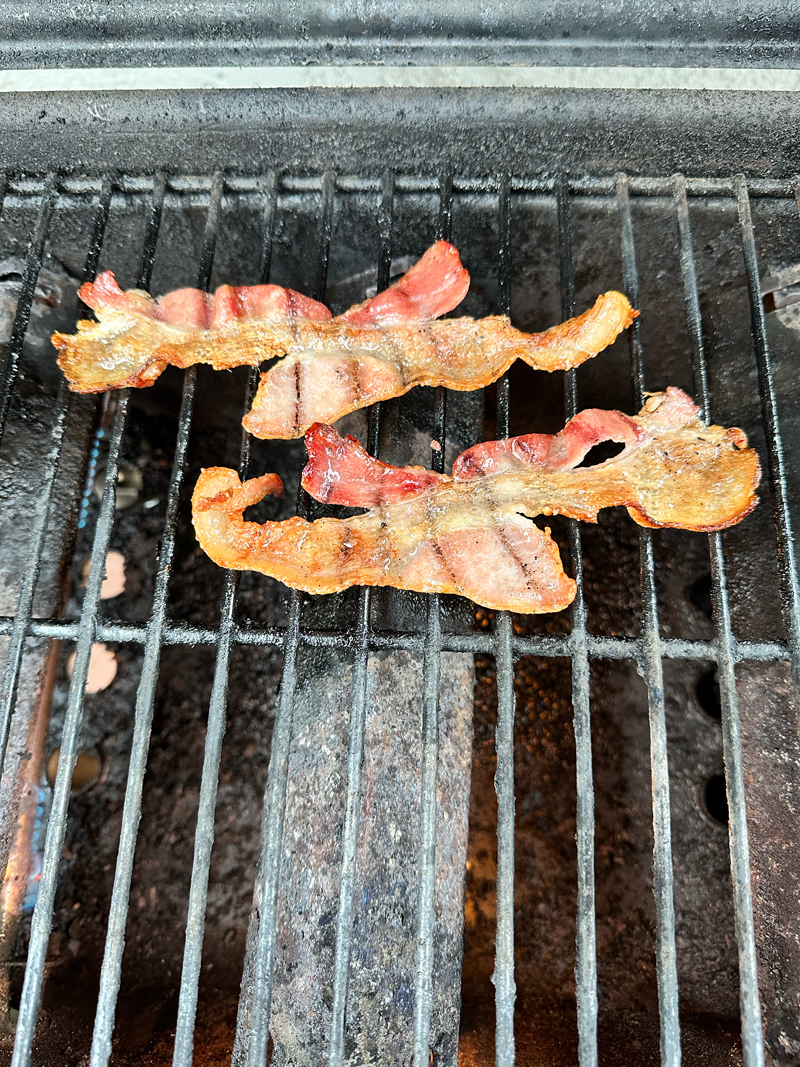
Original Notes:
Medium in color, slightly darker than sous vide, but lighter than pan or oven methods. Medium curly. The lean parts look less hammered while fat looks well rendered. There are some faint grill lines and light blackening at the edges. Biting into it, the taste is… shockingly excellent, actually. Melt-in-your-mouth fat plus chewier meat, and really good flavor.
And this was on a propane grill. With charcoal, I imagine it’d be even better.
Bottom Line:
I don’t know that the grill method was definitely better tasting than wire rack baking — it was probably even money. But considering how much faster it was, not to mention no real setup or cleanup to speak of, I had to give it the edge. Really they both benefit from the same phenomenon — that the fat has someplace to go while the bacon is cooking (not that I’m generally against meat cooking in its own fat). That, and in both cases, the fat rendered without the meat getting too dried out or hard. With the grill method, it actually had a nice chew to it that none of the other methods could match. The downside is that you do have to go outside for it. That being said, you don’t have a grease-filled pan to deal with at the end.
Final Thoughts
I did my best to consider all of the factors involved here — from ease of use to time of cook to labor to cleanup. The grill honestly shocked me, I had no idea it would turn out so well. True, going outside for it is kind of a pain in the butt, but if you’re not up for that, there’s always the wire rack method, which is also delicious.
